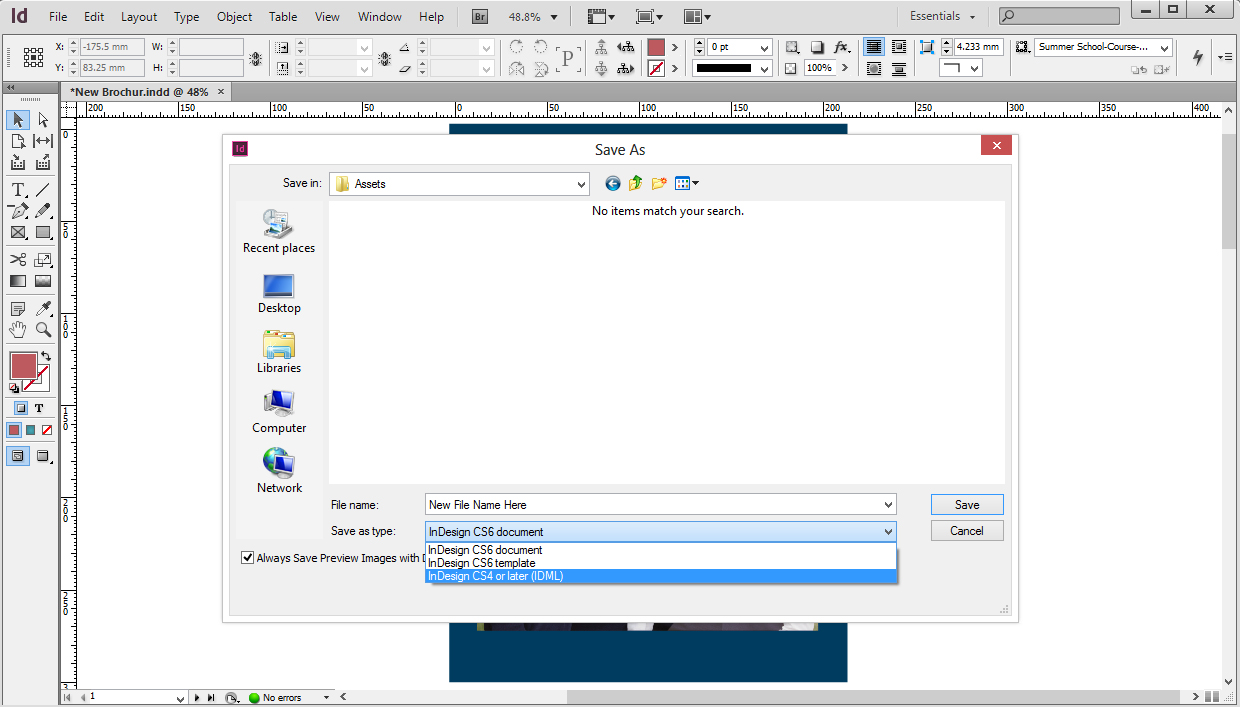


Everyone don’t get the opportunity or have the resources to upgrade the InDesign to the latest version of it. This can be a problem files need to be shared from newer version to resources working with older versions of InDesign. To convert the files to the older version of the InDesign we can take help of IDML and INX option in Save As or Export option of the InDesign.

Note: Sometime you may face some formatting or layout issues in the design file, while opening in older version, However it may be the case all the times.
Open InDesign files from CC / CS6 for use in InDesign CS5.5 /CS5/CS4
IDML files are compatible with all Versions of InDesign CS4 and later.
Open InDesign files from CS5 / CS5.5 for use in InDesign CS4
You can now open the IDML file in CS4 to convert it to an untitled InDesign document.
Open InDesign files in InDesign CS3 from CS5 or above
There is no direct way to save back from InDesign CS5 or latter to InDesign CS3 or earlier because InDesign CS5 doesn't support INX export. InDesign CS4, which supports both INX and IDML, uses INX format to save back to CS3.
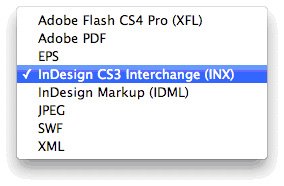
You can now open the INX file in CS3 to convert it to an untitled InDesign document.
Open InDesign files from CS4 or CS3 for use in the previous version
You can now open the INX file in your previous version to convert it to an untitled InDesign document. Save the document, and review it for content changes that you want to address.
The InDesign Saved Data and InDesign Defaults files are application/preference files that store information about plug-ins, settings, and other InDesign data. The preferences are used by all the future document that will be created on the same computer. If the preference files get damaged, the application may start behaving unpredictably, so by recreating these files, you can either solve the problem or just remove the settings simply!
NOTE: Recreating the preferences files will delete any custom settings you have, including document and print presets, transparency flattener presets, and custom stroke styles, and restore all the settings to the defaults.
Reset damaged preferences files
If you’d prefer to delete the preference files manually, you can find them in the following locations. They will be recreated when InDesign is relaunched. Note: If you rename your original preference files before starting, they won’t be overwritten by the new ones, so you can restore them if the new files don’t correct your problem.
Mac OS X
INDESIGN SAVED DATA: aUsers/[user]/Library/Caches/Adobe InDesign/Version [version]/InDesign SavedData
INDESIGN DEFAULTS: Users/[user]/Library/Preferences/Adobe InDesign/Version [version]/InDesign Defaults
Windows XP
INDESIGN DEFAULTS: C:Documents and Settings[user]Application DataAdobeInDesignVersion [version]
INDESIGN SAVED DATA:C:Documents and Settings[user]Local SettingsApplication DataAdobeInDesignVersion [version]Caches
Windows Vista and Windows 7
INDESIGN DEFAULTS: C:UserslabuserAppDataRoamingAdobeInDesignVersion [version]InDesign Defaults
INDESIGN SAVED DATA: C:UserslabuserAppDataRoamingAdobeInDesignVersion [version]CachesInDesign SavedData
This quick fix just might be the solution that saves your workday!
InDesign package folder includes all the files (images, fonts, links etc.) used in the actual design file. Whereas uCreate Print Campaign Package file also includes Page Thumbnails, Datafile, Output PDF for the very first record from the Datafile, Assets Sources (if any), Plan File along with the files included in the indesign package files. However there should not be a considerable difference between InDesign Package and xmPie Package File.
If there is a considerable difference, you must check if you have assigned the Assets Folder or not.
uCreate Print searches for the Assets listed in your Data Source file, and uses their values to replace Content Objects during proofing and dynamic production. By default,uCreate Print assumes that all Assets reside in the same folder as the Data Source file currently linked to your Document, or in its sub-folders. If it is not the case, it is recomended that you set up location for all your Assets, you can use the Set Assets Folder option to specify this location to uCreate Print.
NOTE: It is recomended that always assign an Assets Folder, even if you dont have any assets or files to place inside. If you do not assign the Assets Folder and you datafile is located at a location where all of your design file and links are located, them xmPie uCretate Print will include all the files in the Assets Folder along with the other designated folders. Bellow is the screenshot, how xmPie uCreate Print group the files in a Campaign Package.

Assets specified in the Data Source file may not necessarily include a file extension or data path.
Setting up Assests Folder Location
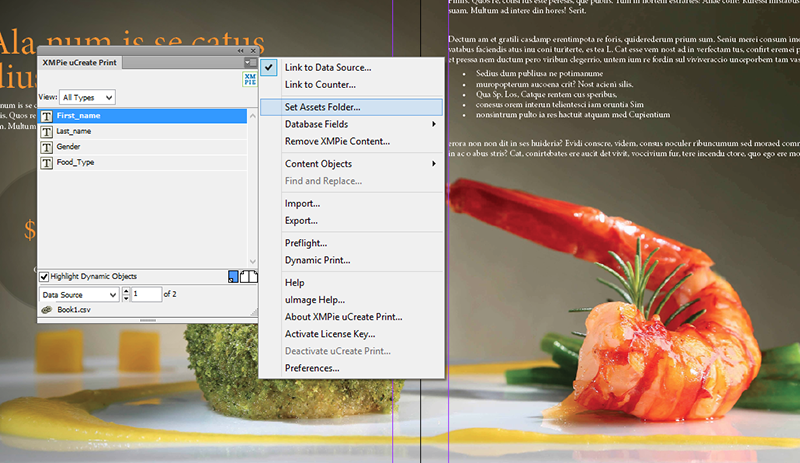
To Setup Assets Folder, first you need to click on Drop Down Menu from the top-right corner of uCreate Print pane. Then select "Set Assets Folder" option from the menu. (see bellow)
From the Dialogue Box, navigate to the desired folder. (see bellow)
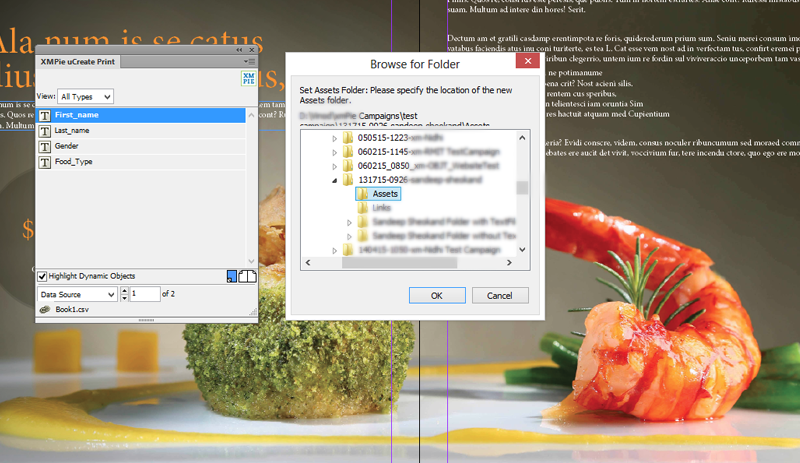
Once you have selected the desired Assets Folder, Click OK button.
The Assets Folder is assigned now for this particular campaign package file.
This if one of the best feature of InDesign that it can handle word formattng and styles. This can save your lots of time while maximising you efficiency.
STEP-1
Before you start importing a long word document to InDesign, you need to clean up unused styles or to assign new styles to the text that has no style. To avoid any unexpected results you need all text to have paragraph style or character style. Using Find and Replace option is word can help you finding all paragraph text that has specific formatting and assign it a specific paragraph style.
Edit > Find > Advanced Find and Replace
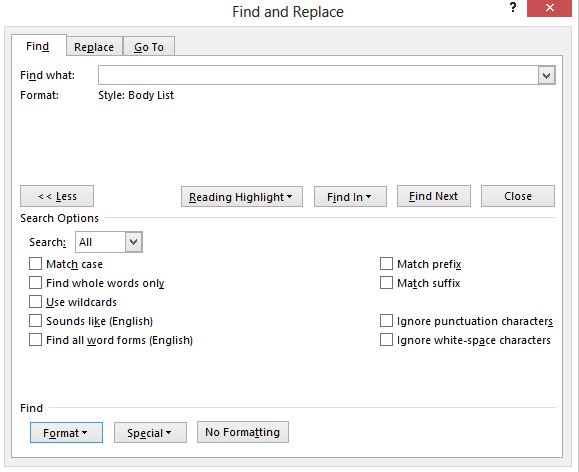
If you are working with multiple word documents, you can export your word styles to other word file or word global template file (if you need the style for a long time, just in case if you want to..).
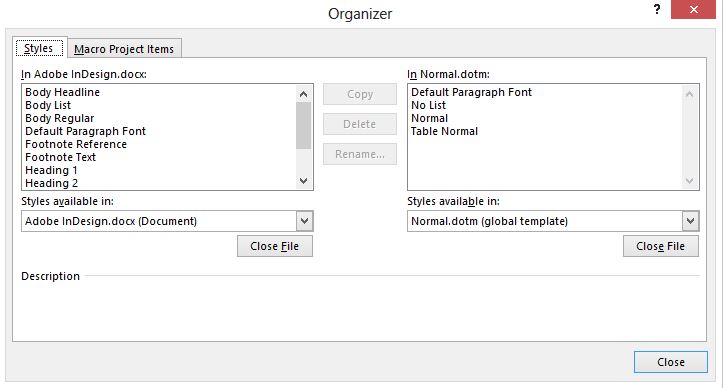
NOTE:If you want to import or export from/to the other document you have to click on Close file and then the option will turn to Open File. Now you can select the file from/to you want to copy the styles.
STEP-2
Once you have ready with STEP-1, you can now import the word docuemt to the InDesign File. Create a text frame, where you want to place the text.
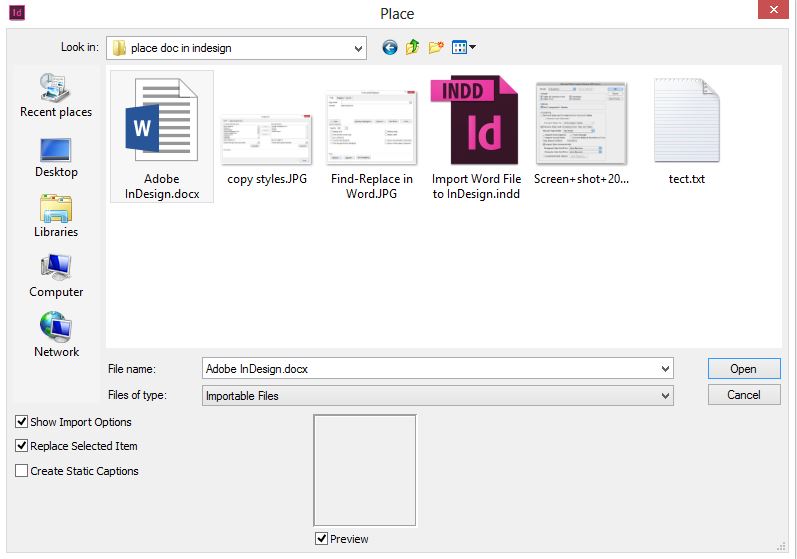
File > Place > Select the file to import (don't select the Show Import Options if you want to keep the Word Document Formatting and Styles)
Now you will see that your document will be imported with the formatting intact. You can also check all the word style in your paragraph or character style pane.
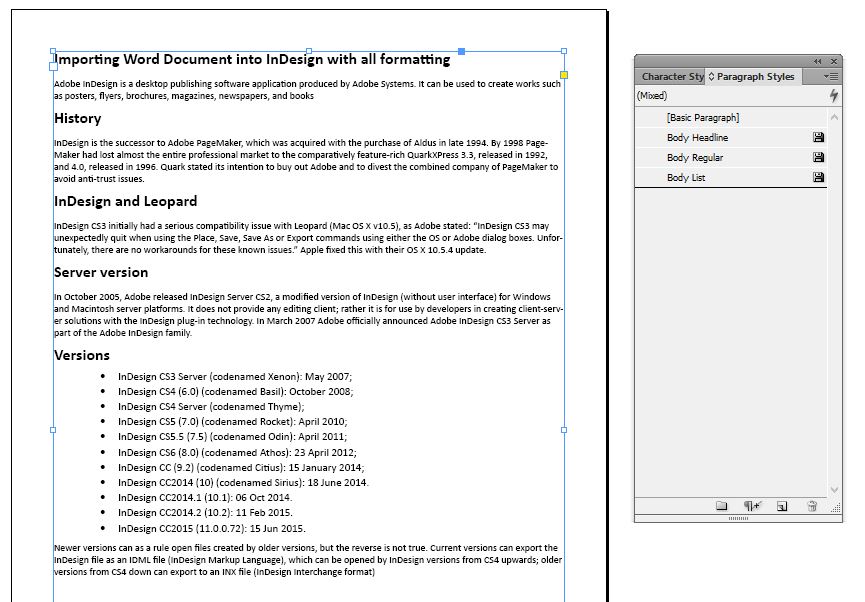
However if you have predefined indesign styles you can simply map the existing InDesign styles with the Word Docuement styles. Go to STEP-3
STEP-3
Remember to select Show Import Options while selecting the Word Document in InDesign.
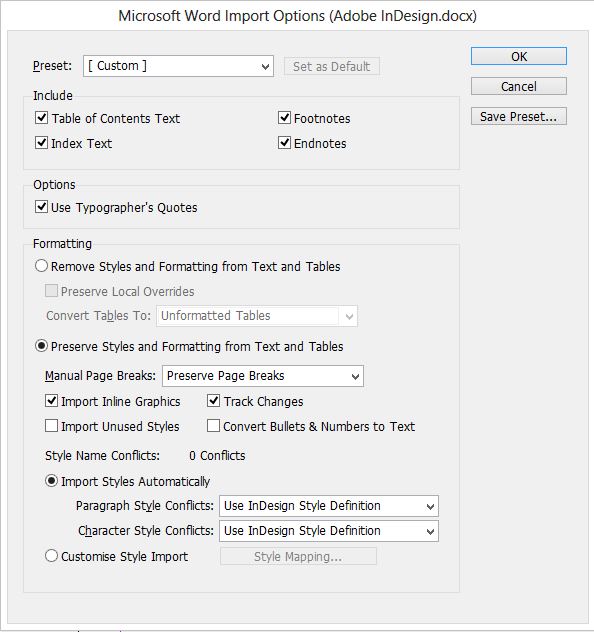
You can Choose to Remove/Preserve the Styles and Formatting from the Text and Table.
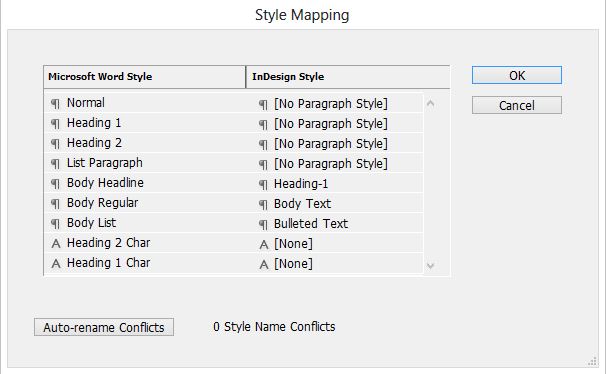
If you want to map the Word Document style with the InDesign Styles, Select Preserve Styles and Formatting from Text and Tables. Now select Customise Style Imports and click on Style Mapping
Select the Styles to map with InDesign styles. Once done click Ok.
Here is completely formatted word document. Enjoy
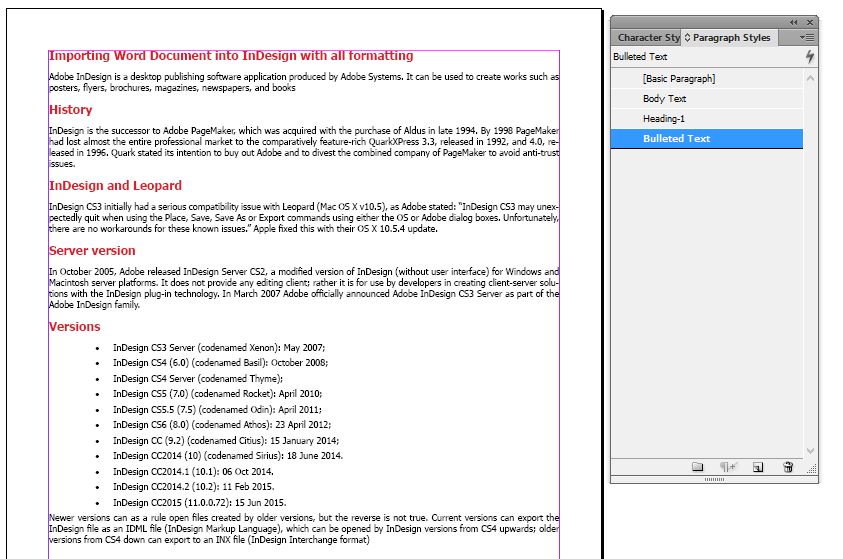
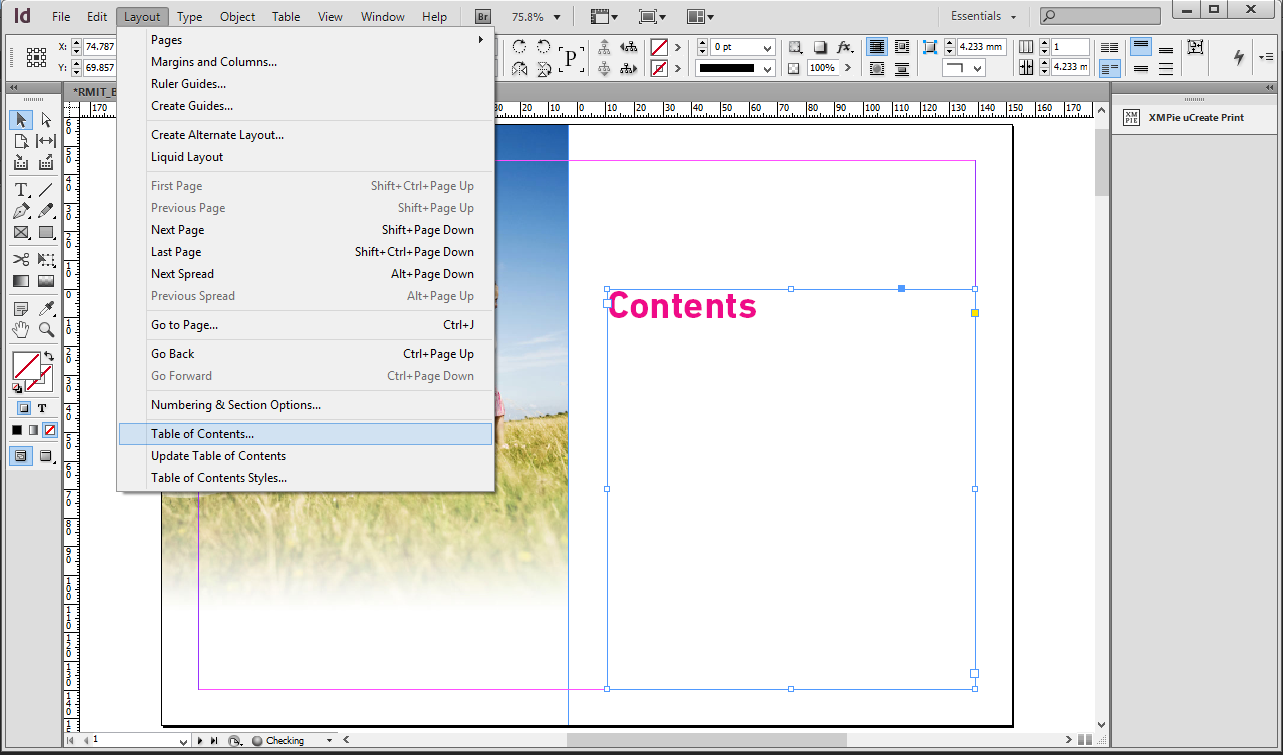
Table of Content is another great feature of InDesign. In a well organised design, it saves a lot of precious time of designers while reducing the chances of errors.
Creating Table of Content
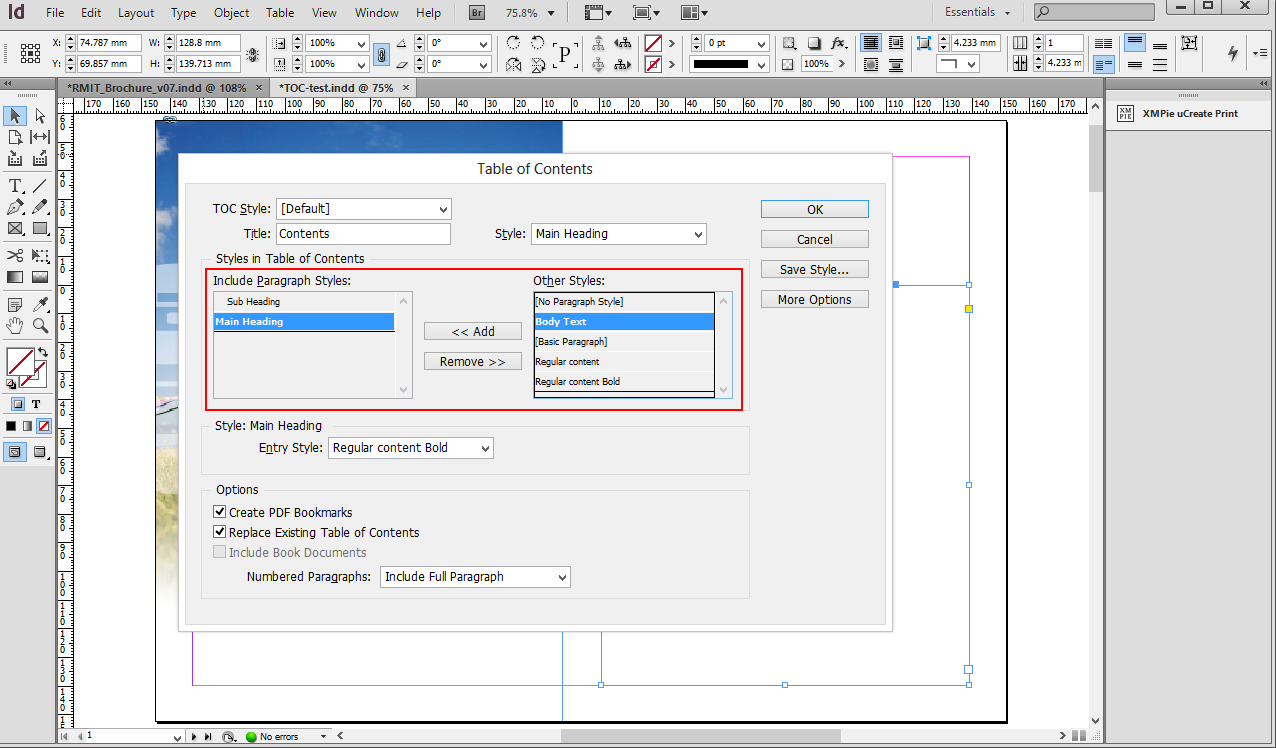
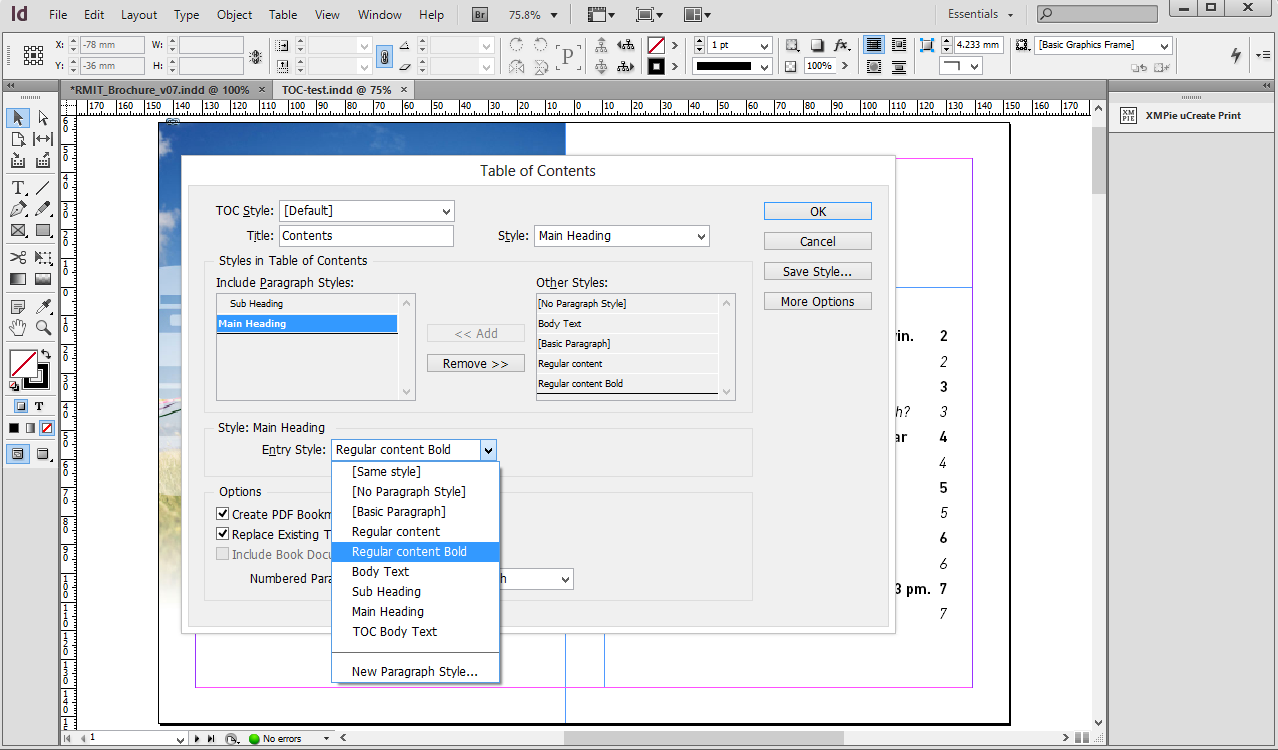
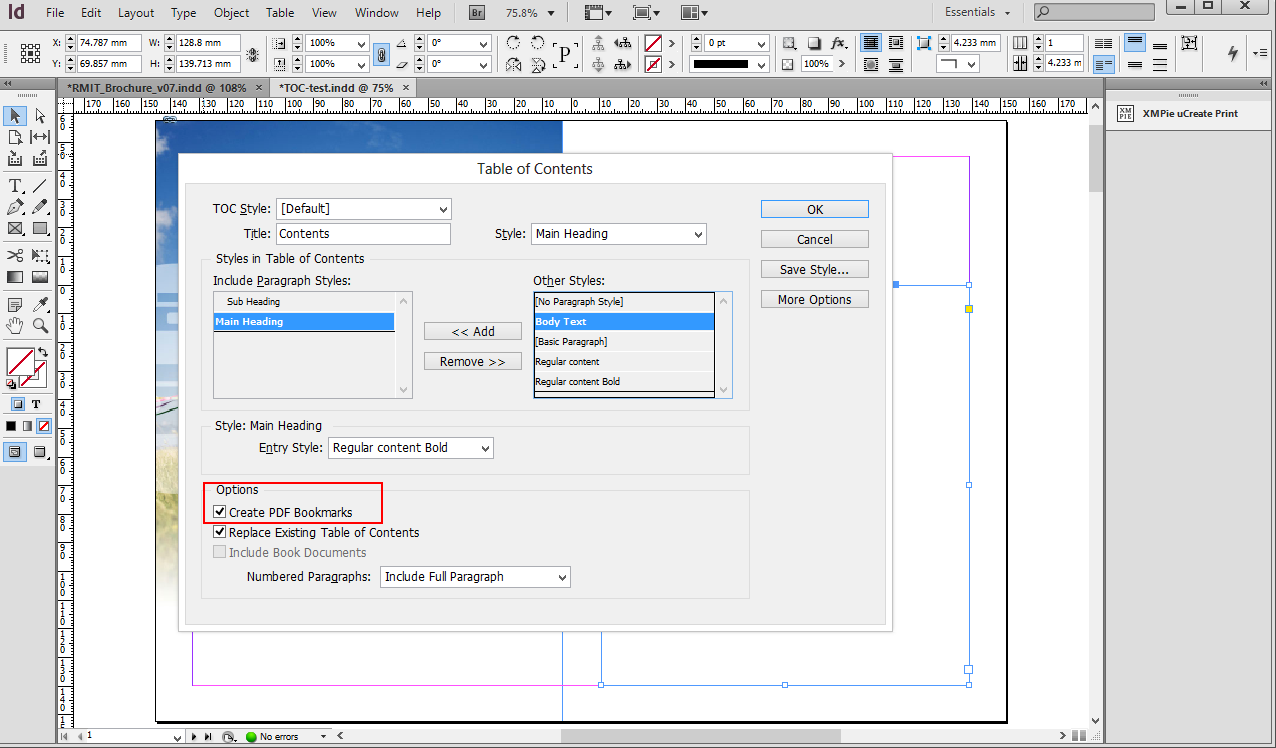
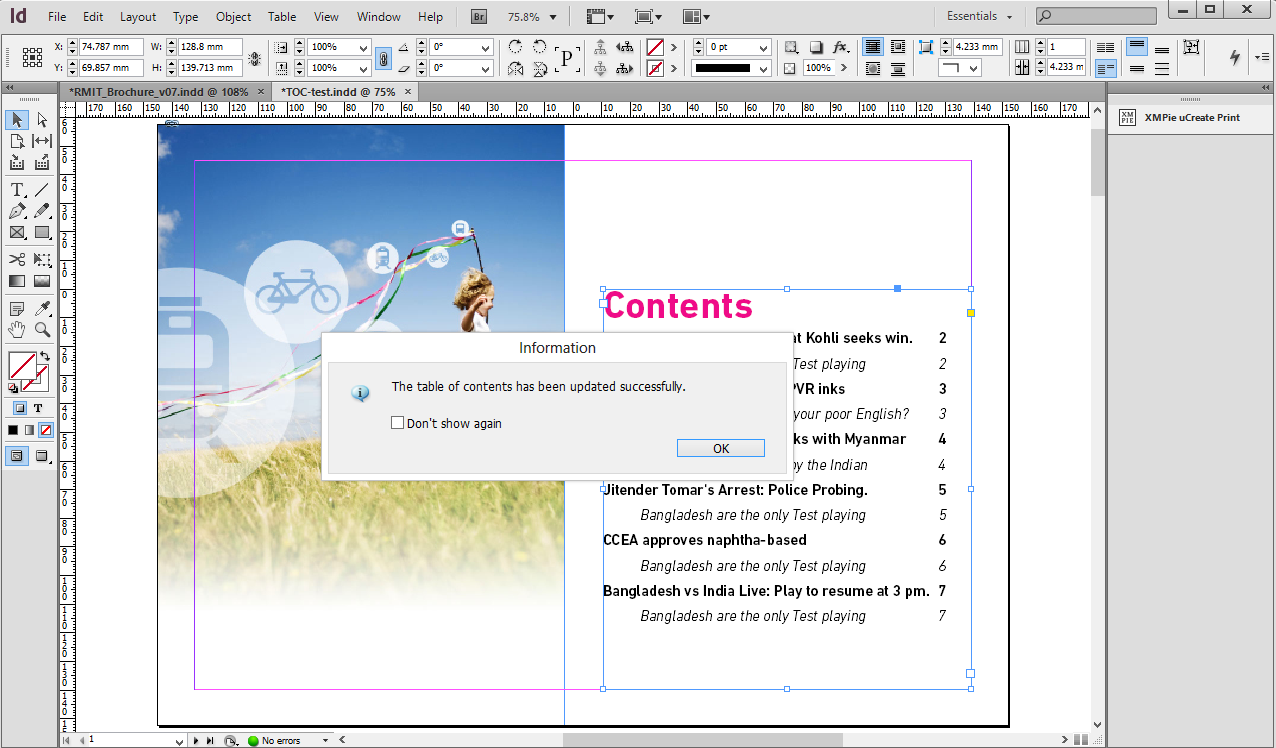
This is little tricky but pretty awesome option to get rid of creating a lot of Rule or ADORS to setup visibility of a large number of inDesign layers. Here we will make a document with multiple layers and setup visibility with a single ADOR.
Lets consider a Campaign where we have print some Tickets with different catagories. Each catagory will have different design.
Let's work step by step for this...
Ticket Designs and Data file
Here we have different designs for every catagories of Ticket. we also need the data file for the dynamic data and details of ticket catagory. I have created a sample data-file for this one.
In the tickets I have only created two dynamic fields i.e. persion name and QR code for the PURL. Hope you are aware of all that stuff.
Here we go...
First of all let's arrange the designs on layers. Rename the layers. Lets say with the ticket catagory names (Standard, Silver, Bronze, Gold, Platinum and Generic). Do not name the layer 0, 1, true and false as these keywords are resevered for Visibility ADOR. Remember that Visibility Ador is case sensative i.e. the data should have the catagory name exactly as the layer names.
Create a New Content Object for Visibility and set the condition for value of Column which has got the catagory names. Remember this option with work only if the database and the design layer name are exactly same.
If you have different values in your database for the catagories you have to manualy set the condtion for the layer's visibility.
Voila.!! and all set to go..